For June's Round Table We shared ideas for
July's Core Value: Courage
July's Theme: Under the Sea
August's Core Value: Honesty
August's Theme: Play Ball
Opening
Brain Teaser - This would be a great thing to write on the chalk or
white board for boys and parents to have something to think about while they
wait for everyone to arrive at a Pack or Den Meeting. (An idea you could use would be to reward the
cub scouts a piece of candy if they get it right).
How can three ones add up to two?
*Answer is at the end of this section. (scroll down)
(Brain Teaser taken from: The Little Black Book of
Mindbenders by John Samson and Elsie Samson; pg. 46)
Gathering Activity
Play Ball Sports Name Tags

Materials: markers;
pre-cut circles of appropriate colors (white/ tan/light green).
As families arrive,
complete a name tag for each member, using pre-cut circles of different colors.
Encourage the families to add details, making their name tags look like the
balls used in favorite games (e.g., red lines for baseball, black shapes for
soccer). It may be helpful to bring pictures of the various types of balls to
aid them in decorating the circles.
Flag
Ceremony (AM Round Table)Fishing for Fun
 Personnel/Materials:
den leader and 5 Cub Scouts; an empty child’s swimming pool or a
large, empty bucket; 5 fishing rods (can be sticks with strings and clothes
pins attached). At the end of each string is a card with the boys’ lines
printed for them to read. The Cub Scouts sit in a semi-circle, facing the
audience. Each boy in turn pulls his card from the pool/bucket and reads it.
Feel free to modify the script based on recent pack activities.
Den
leader: In Cub Scouting, we go fishing for fun every week. Let’s see what
these boys have caught.
Cub #1:
I went fishing for fun, and I learned how to use a knife.
Cub #2: I went
fishing for fun, and I earned my Bobcat badge.
Cub #3:
I went fishing for fun, and I went on a trip to the zoo.
Cub #4:
I went fishing for fun, and I went to Cub Scout day camp.
Cub #5:
I went fishing for fun, and I learned how to say the Pledge of
Allegiance. Please join us now in saluting our flag.
Personnel/Materials:
den leader and 5 Cub Scouts; an empty child’s swimming pool or a
large, empty bucket; 5 fishing rods (can be sticks with strings and clothes
pins attached). At the end of each string is a card with the boys’ lines
printed for them to read. The Cub Scouts sit in a semi-circle, facing the
audience. Each boy in turn pulls his card from the pool/bucket and reads it.
Feel free to modify the script based on recent pack activities.
Den
leader: In Cub Scouting, we go fishing for fun every week. Let’s see what
these boys have caught.
Cub #1:
I went fishing for fun, and I learned how to use a knife.
Cub #2: I went
fishing for fun, and I earned my Bobcat badge.
Cub #3:
I went fishing for fun, and I went on a trip to the zoo.
Cub #4:
I went fishing for fun, and I went to Cub Scout day camp.
Cub #5:
I went fishing for fun, and I learned how to say the Pledge of
Allegiance. Please join us now in saluting our flag.
Flag
Ceremony (PM Round Table)
Sportsmanship Promise
Cubmaster:
We promise to be honest and trustworthy in following the rules of
our games. We will engage in fair competition, in the true spirit of
sportsmanship, for the honor of our dens and for the glory of the sport. Do you
all promise to do your best in following these rules?
Cub
Scouts: We do.
Cubmaster: Let us all stand and face our country’s flag as we repeat the
Pledge of Allegiance.
Duct Tape Fish

Materials: Colored
Duct Tape, large paper clips, strong magnet with hole in middle(Home Depot),
E6000 glue, twine or string, dowel, ruler, scissors, blue painters tape, black
marker & fish template(click here for fish
template: https://drive.google.com/open?id=0B0revQcSgs4OekY1amdlMHFiS2c&authuser=0 )
Directions:

1) Cut off a strip of Duct Tape about 4 1/2 inches long. Take a large paper clip and place it in the
middle toward one end of the duct tape. Then cut off another piece of duct tape
4 1/2 inches long and place it on top, sandwiching the paperclip inside.

2) Cut out a fish template. Put a piece
of blue painters tape on back and tape it to the Duct Tape centering the
paperclip in the body of the fish. Then
cut out the fish.

3) There are lots of options for using the fish. Here are a few ideas. A)You can write A,B,C,D on the fish for
multiple choice questions you make up to teach any Adventure requirement. B) You can ask yes or no questions about an
Adventure requirement for your boys to answer. C) You can write down the boys
names and fish to see who is chosen for Den Meeting duties each month. D) You
can leave it blank and use just the different colors for multiple choice
questions. E) You can teach math and
write down a bunch of numbers and have the boys fish for two fishes that add up
to a number you tell them. (This one would be great for a gathering activity).
FISHING POLE

4) Cut the dowel to be 18 inches long.
5) Cut the string to be 60 inches long.

6) Put some E6000 glue on one end of the dowel.
Then take the twine(or string) and place one end of the twine over the
glue; sticking out past the dowel 2 inches.
Then with your thumb holding the twine in place, wrap the long end of
the string around the dowel 14 times.
Pull the short end of the sting up to get rid of the loop you created by
holding the string with your thumb.
After this, tie the two ends (short and long) in a square knot. On the other end of the twine tie the magnet
on. Place a dot of glue on both knots to
secure them.

7) Because you made the fish out of Duct Tape, you have the option of playing
with them using a bucket of water because they will stay intact.
Flag Block for Table Top Small Flags

Around the 4th of July they sale small flags. Here is a base you can make for those flags
so you can practice a flag ceremony in your dens each week. This will help the boys be more prepared to
do a flag ceremony at pack meetings.
Materials:.4x4
wood post, wood stain, blue paint, red paint, Cub Scout Emblem picture (Click on link: https://drive.google.com/open?id=0B0revQcSgs4OM2trQ1BrdTVlY1E&authuser=0 ),
Modge Podge, foam brushes, paint brush.
Directions:
1) Cut the 4x4 wood post 3" in height for each wood base you want to make
and sand it.
2) Drill a hole in the top of one of the 4x4x3 wood blocks you just made. The hole should be deep enough to put the
flag pole in so it will not fall over, but not go all the way through the block
either.

2) Using a rag and gloves, apply stain on every side of the wood block except
the top where the hole is located. Let
this dry.

3) After the stain has dried, paint the top either blue or red using a foam
brush. Then let the paint dry.

4) After the paint has dried, cut out a Cub Scout Emblem and Modge Podge it on
with a paint brush. Let this set and dry.
Now you are ready to use it for your flag base. (Link to the cub scout emblem page: https://drive.google.com/open?id=0B0revQcSgs4OM2trQ1BrdTVlY1E&authuser=0)
Teaching Honesty
This idea originated from this site with some modifications I
made: http://www.fisdk12.net/wb/character/cc_trust.html

Materials: A bucket, some spray paint that can cover metal (The paint should
contrast the color of the bucket), Two 3/4" x 2" Flat Washers. Lots
of 1/8" x 1" Fender Washers, Pennies, glue and glue gun,
"Honesty is the BEST policy" cards (Click
on this link for card templates: https://drive.google.com/open?id=0B0revQcSgs4OUHlwekVpT0FWQmM&authuser=0 ),
scotch tape.
Directions:

1) Spray paint the two 3/4" x 2"
Flat Washers. Note: Be sure to use a
color of paint that will contrast the color of the bucket so the boys can see
the washer once placed in a bucket of water.
Example: If you have an orange bucket, paint the washers yellow or
white. If you have a white bucket, paint
the washers red or orange.

2) After the paint dries, hot glue a penny inside the middle of ONE of the
3/4" x 2" flat washers. Set
the other washer aside. To hot glue the
penny inside the washer do this: while
holding the penny, put hot glue around the edge where you are not touching
it. Then insert the penny in the middle
of the washer. There will be a gap
between the washer and the penny where you were holding the penny. Go ahead and apply hot glue to this area now.
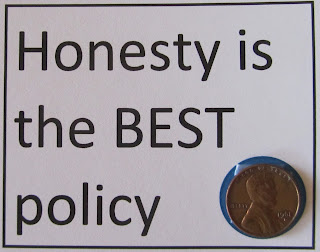
3) Print off the "Honesty is the BEST policy" cards. Using Scotch Tape, tape a penny to the circle
on the card. These can be given to the boys to take home to remind them of the
lesson.

4) Fill the bucket half way with water.
5) Place the 3/4" x 4" washer, without the penny" in the water
in the middle of the bottom of the bucket.
6) Have the boys drop the 1/8" x1" Fender Washers one by one trying
to cover up the big washer.
HONESTY LESSON
The 3/4" x 2" washer without the penny in the middle represents a
lie. It has a big hole in it to
represent that the whole truth was not told. The smaller washers represent
small fibs to cover up the big lie. The small holes in these washers represent,
that every lie told is not the truth. Tell the boys to drop the smaller washers in
the bucket one by one and try to cover up the big washer. This is very difficult to do. Tell the boys that it takes a lot of small
lies to cover up a big one. Then show
the boys the washer with the penny in it.
Point to Abraham's picture on the penny.
Tell the boys that President Abraham Lincoln was known for his honesty
and integrity. It takes honesty to fill
in the hole of a lie like this penny is needed to fill in the hole of the
washer.
July's Core Value: Courage
July's Theme: Under the Sea
August's Core Value: Honesty
August's Theme: Play Ball
(Brain Teaser taken from: The Little Black Book of Mindbenders by John Samson and Elsie Samson; pg. 46)
Play Ball Sports Name Tags

Materials: markers; pre-cut circles of appropriate colors (white/ tan/light green).


Materials: Colored Duct Tape, large paper clips, strong magnet with hole in middle(Home Depot), E6000 glue, twine or string, dowel, ruler, scissors, blue painters tape, black marker & fish template(click here for fish template: https://drive.google.com/open?id=0B0revQcSgs4OekY1amdlMHFiS2c&authuser=0 )
Directions:

1) Cut off a strip of Duct Tape about 4 1/2 inches long. Take a large paper clip and place it in the middle toward one end of the duct tape. Then cut off another piece of duct tape 4 1/2 inches long and place it on top, sandwiching the paperclip inside.

2) Cut out a fish template. Put a piece of blue painters tape on back and tape it to the Duct Tape centering the paperclip in the body of the fish. Then cut out the fish.

3) There are lots of options for using the fish. Here are a few ideas. A)You can write A,B,C,D on the fish for multiple choice questions you make up to teach any Adventure requirement. B) You can ask yes or no questions about an Adventure requirement for your boys to answer. C) You can write down the boys names and fish to see who is chosen for Den Meeting duties each month. D) You can leave it blank and use just the different colors for multiple choice questions. E) You can teach math and write down a bunch of numbers and have the boys fish for two fishes that add up to a number you tell them. (This one would be great for a gathering activity).
FISHING POLE

4) Cut the dowel to be 18 inches long.
5) Cut the string to be 60 inches long.

6) Put some E6000 glue on one end of the dowel. Then take the twine(or string) and place one end of the twine over the glue; sticking out past the dowel 2 inches. Then with your thumb holding the twine in place, wrap the long end of the string around the dowel 14 times. Pull the short end of the sting up to get rid of the loop you created by holding the string with your thumb. After this, tie the two ends (short and long) in a square knot. On the other end of the twine tie the magnet on. Place a dot of glue on both knots to secure them.

7) Because you made the fish out of Duct Tape, you have the option of playing with them using a bucket of water because they will stay intact.

Around the 4th of July they sale small flags. Here is a base you can make for those flags so you can practice a flag ceremony in your dens each week. This will help the boys be more prepared to do a flag ceremony at pack meetings.
Directions:
1) Cut the 4x4 wood post 3" in height for each wood base you want to make and sand it.
2) Drill a hole in the top of one of the 4x4x3 wood blocks you just made. The hole should be deep enough to put the flag pole in so it will not fall over, but not go all the way through the block either.

2) Using a rag and gloves, apply stain on every side of the wood block except the top where the hole is located. Let this dry.

3) After the stain has dried, paint the top either blue or red using a foam brush. Then let the paint dry.

4) After the paint has dried, cut out a Cub Scout Emblem and Modge Podge it on with a paint brush. Let this set and dry. Now you are ready to use it for your flag base. (Link to the cub scout emblem page: https://drive.google.com/open?id=0B0revQcSgs4OM2trQ1BrdTVlY1E&authuser=0)
This idea originated from this site with some modifications I made: http://www.fisdk12.net/wb/character/cc_trust.html

Materials: A bucket, some spray paint that can cover metal (The paint should contrast the color of the bucket), Two 3/4" x 2" Flat Washers. Lots of 1/8" x 1" Fender Washers, Pennies, glue and glue gun, "Honesty is the BEST policy" cards (Click on this link for card templates: https://drive.google.com/open?id=0B0revQcSgs4OUHlwekVpT0FWQmM&authuser=0 ), scotch tape.
Directions:

1) Spray paint the two 3/4" x 2" Flat Washers. Note: Be sure to use a color of paint that will contrast the color of the bucket so the boys can see the washer once placed in a bucket of water. Example: If you have an orange bucket, paint the washers yellow or white. If you have a white bucket, paint the washers red or orange.

2) After the paint dries, hot glue a penny inside the middle of ONE of the 3/4" x 2" flat washers. Set the other washer aside. To hot glue the penny inside the washer do this: while holding the penny, put hot glue around the edge where you are not touching it. Then insert the penny in the middle of the washer. There will be a gap between the washer and the penny where you were holding the penny. Go ahead and apply hot glue to this area now.

3) Print off the "Honesty is the BEST policy" cards. Using Scotch Tape, tape a penny to the circle on the card. These can be given to the boys to take home to remind them of the lesson.

4) Fill the bucket half way with water.
5) Place the 3/4" x 4" washer, without the penny" in the water in the middle of the bottom of the bucket.
6) Have the boys drop the 1/8" x1" Fender Washers one by one trying to cover up the big washer.
HONESTY LESSON
The 3/4" x 2" washer without the penny in the middle represents a lie. It has a big hole in it to represent that the whole truth was not told. The smaller washers represent small fibs to cover up the big lie. The small holes in these washers represent, that every lie told is not the truth. Tell the boys to drop the smaller washers in the bucket one by one and try to cover up the big washer. This is very difficult to do. Tell the boys that it takes a lot of small lies to cover up a big one. Then show the boys the washer with the penny in it. Point to Abraham's picture on the penny. Tell the boys that President Abraham Lincoln was known for his honesty and integrity. It takes honesty to fill in the hole of a lie like this penny is needed to fill in the hole of the washer.
Sports Quiz
Materials:
paper and pencils for families to write down their answers.
The Cubmaster asks the
questions and families choose the best answer. Points may be scored at the end for all correct
answers.
1. What famous baseball
player said, “Ninety percent of this game is half mental?”
2. A “puck” is used in
which of the following sports? A. Rugby; B. Hockey; C. Lacrosse
3. True or False: There
are no goal lines in tennis.
4. True or False: There
are six players on a basketball court at the same time.
5. In what sport would
you find a fairway?
6. True or False:
Bowling balls are made of wood.
7. A foul shot is done
in A. Rugby; B. Tennis; C. Basketball
8. When a football
official raises his hands above his head, he is signaling A. Score; B. Time
Out; C. Penalty
Answers:
1. Yogi Berra. 2. B, Hockey. 3. True. 4. False; there are
five. 5. Golf. 6. False.
7. C, Basketball. 8. A, Score.
Cheers
Home
Run Cheer:
Simulate swinging a bat, then shade your eyes with your hand while
pointing to an imaginary flying ball and say, "Thar she goes."
Hot Dog
with Mustard Cheer: Get
your hot dog and put it in a bun. PIck
up the musard bottle and squeeze some mustard on the hot dog. Then take a bite an say, "Yummmm!"
The
Swelling Wave Cheer: The wave cheer like they do at
sporting events.
Opening Brain Teaser
Answer: 1 + 1/1 = 2
Home Run Cheer: Simulate swinging a bat, then shade your eyes with your hand while pointing to an imaginary flying ball and say, "Thar she goes."
Hot Dog with Mustard Cheer: Get your hot dog and put it in a bun. PIck up the musard bottle and squeeze some mustard on the hot dog. Then take a bite an say, "Yummmm!"
The Swelling Wave Cheer: The wave cheer like they do at sporting events.


